
This Tutorial will show you how to implement time motion into VEX code but also teach you how to pass parameters such as $F into VEX and mention how to access frame number and the current time in python.
About the trouble with $F
In the previous example we saw how $F can be used to manipulate node parameters. However, we can not simply use $F inside a VEX code of a wrangler. That would be too nice. The reason: $objects are part of Houdini’s Hscript language that is different from the VEX language. After dealing with $F we will see how there are easier solutions.
Now we need to pass $F over to the point wrangle code through channels. Lets show this with an example where we let a spiral curve spin. First we need the basic node chain to create the spiral.
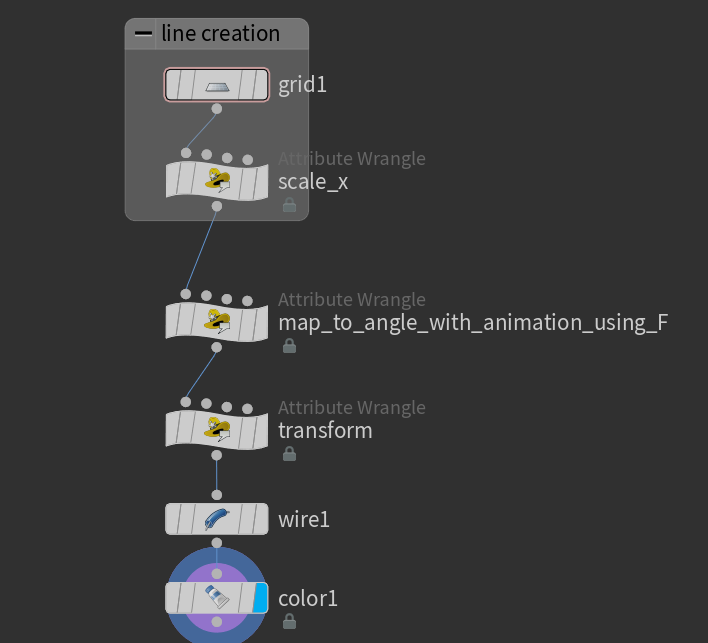
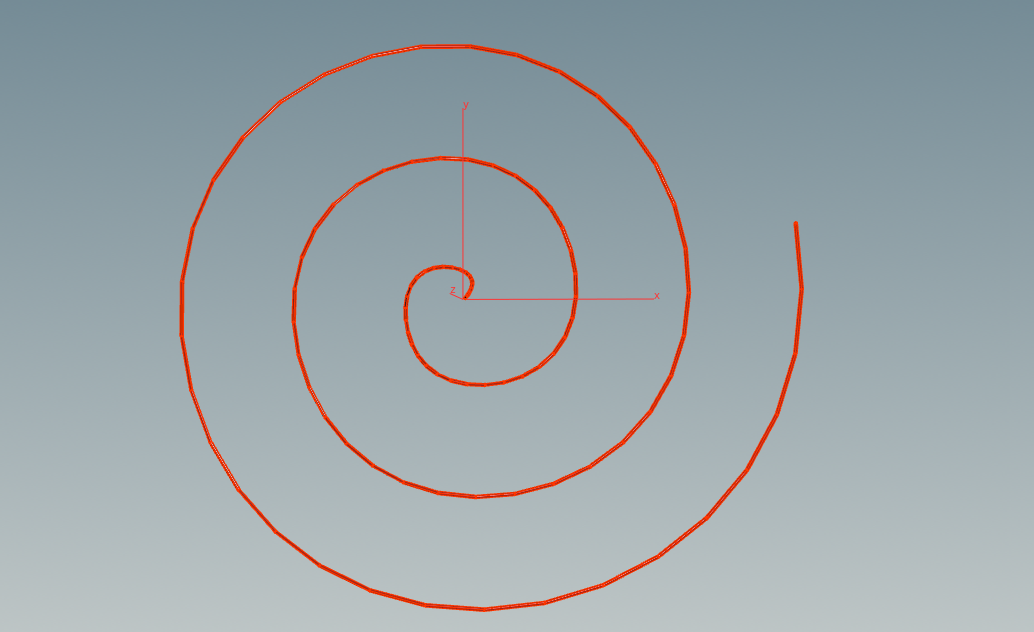
The grid was given 100 points and the scale_x node does the same as in the simple curve example:
|
1 2 3 4 |
// Here we just take the short curve from above and // map to the [0,1] interval @P.x = @P.x+.5; // note that @P.y=@P.z=0 |
The spiral transform ist done with the following code depending on the attribute value of f@phi at every point. We will explain how f@phi is defined below.
|
1 2 3 4 5 6 7 8 9 10 11 |
//here we map every point of the curve to a new value // pick a point on the spiral //float r = pow(1.05,phi)*10; // logarithmic float r = max(f@phi,0); // archimedean float x = r*cos(f@phi); float y = r*sin(f@phi); float z = 2*sin(r*3); // copy the result @P.x =x; @P.y=y; @P.z=z; |
Transfering $F to VEX
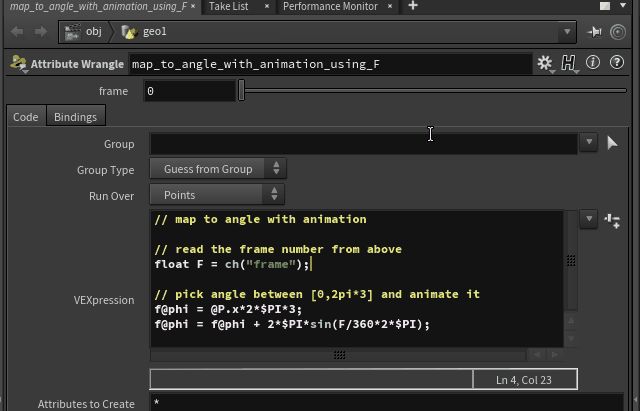
In order to include the output of $F we need to create another node parameter just like in the previous tutorial on creating geometry from scratch. Open the Parameter interface of the point wrangle node (the one that handles the animation) and drag and drop a floating parameter into to right side. Rename the parameter in order to access it by name inside the VEX code.
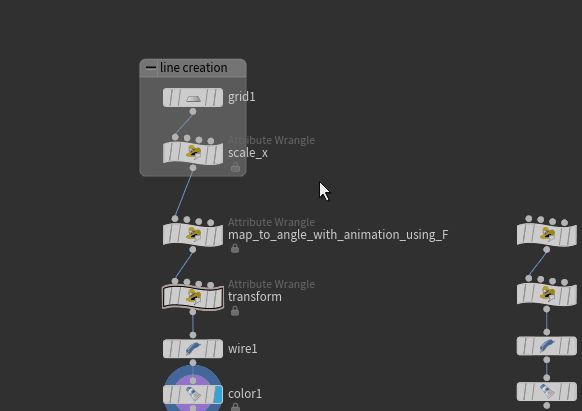
Now modify the parameter by inserting $F into it. Then edit the VEX code to look like this.
|
1 2 3 4 5 6 7 8 |
// map to angle with animation // read the frame number from above float F = (ch("frame")); // pick angle between [0,2pi*3] and animate it f@phi = @P.x*2*$PI*3; f@phi = f@phi + 2*$PI*sin(F/360*2*$PI); |
Now hit play to see the frames in action. Adjust the global animation options or scale the parameters for speed and max-number-of-frames adjustment.
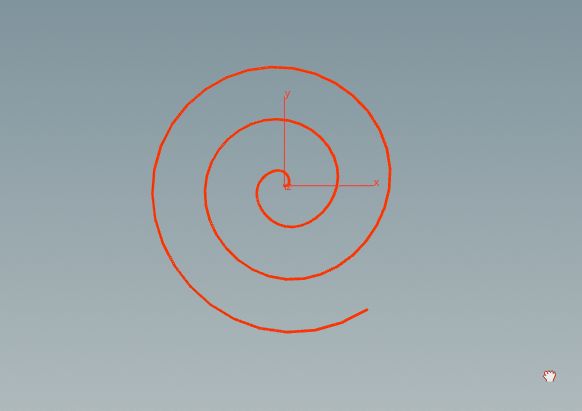
About the non-trouble with @Time and @Frame
We already covered in the simple curve tutorial the usage of the @Time global parameter. Simply write @Time or @Frame inside the VEX code to archive the animation after pressing play. We can modify the code above to do just that:
|
1 2 3 4 5 6 7 8 |
// map to angle with animation // read the frame number directly float F = @Frame; // pick angle between [0,2pi*3] and animate it f@phi = @P.x*2*$PI*3; f@phi = f@phi + 2*$PI*sin(F/360*2*$PI); |
You can optionally also use @Frame to get the floating point number of the frame number.
In Python Code
Inside a python node you will be in need of different commands to access the frame number and time. Here are two ways from the python reference page of houdini.
|
1 2 |
hou.frame() # returns frame number inside python hou.time() # returns the time |
To access the $F inside the channel use hou.ch( … )
here is an example of python code with acces to the frame number:
|
1 2 3 4 5 6 7 8 9 10 11 12 13 14 15 16 17 18 19 20 21 22 23 |
import numpy import math node = hou.pwd() geo = node.geometry() # Add code to modify contents of geo. # Use drop down menu to select examples. # read attributes Px = numpy.array(node.geometry().pointFloatAttribValues("Px")) # pick angle between [0,2pi*3] pi = math.pi; phi = Px*2*pi*3 # and animate it F = hou.frame() phi = phi + 2*pi*math.sin(F/360*2*pi); # store into attribute for VEX code geo.setPointFloatAttribValuesFromString("phi",phi.astype(numpy.float32)) |
Note that the above code only works if you use this node before the python node. This is because here the communication between python and existing attributes is done using floats, not vectors:
|
1 2 3 4 5 6 |
// needed to target existing float attributes in python f@phi = 0; // define attributes for each position f@Px = @P.x; f@Py = @P.y; f@Pz = @P.z; |
