
On windows, python is installed by default in Houdini. In Mac OSX Houdini uses the system’s python and for Linux please refer here.
About Python
Instead of using wrangle nodes you can also place python nodes to take advante of the huge mass of python implementations of algorithms out there.
But never forget this: Quite often the same task implemented in VEX leads to a much better performance than the corresponding implementation in python. The reason is that VEX is compiled on the fly in such a way as to exploit all available possibilities for parallelization.
On the other hand, Python offers a wealth of numerical libraries. This means that many tasks have to be done in Python, but the standard choice should be VEX. Remember to avoid python loops wherever possible. Many recurrent tasks can be performed without loops in python and are usually much faster.
Example
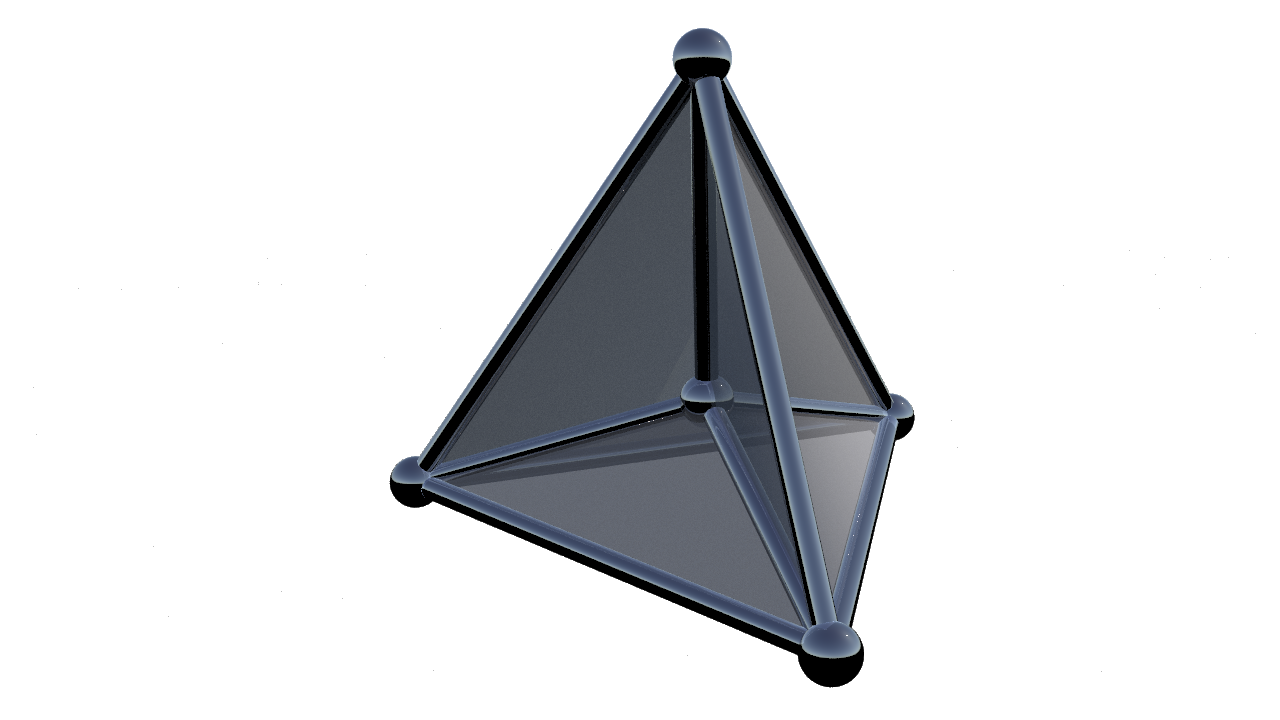
The exact same geometry that we created in the tutorial creating geometry from scratch can also be done in python using the following code.
|
1 2 3 4 5 6 7 8 9 10 11 12 13 14 15 16 17 18 19 20 21 22 23 24 25 26 27 28 29 30 31 32 33 34 35 36 37 |
# Python node example # all python code runs only once # create a basic geometry # grab self geometry index node = hou.pwd() geo = node.geometry() # create 4 points and remember their names p0 = geo.createPoint() p1 = geo.createPoint() p2 = geo.createPoint() p3 = geo.createPoint() p4 = geo.createPoint() # edit their position values p0.setPosition((0,0,0)) p1.setPosition((.5,.5,.5)) p2.setPosition((.5,-.5,-.5)) p3.setPosition((-.5,.5,-.5)) p4.setPosition((-.5,-.5,.5)) # define a funciton to create triangels def addTriangle(p,q,r): # create polygon of 3 corners f = geo.createPolygon() f.addVertex(p) f.addVertex(q) f.addVertex(r) # create triangles inbetween the points addTriangle(p0,p1,p2) addTriangle(p0,p1,p3) addTriangle(p0,p1,p4) addTriangle(p0,p2,p3) addTriangle(p0,p2,p4) addTriangle(p0,p3,p4) |
Houdini will give us a set of functions needed in order to handle the geometry and link VEX code with python code. You can of course read the online documentation on python in Houdini.
Perhaps the most important python command to use will be
|
1 2 3 |
# geometry access node = hou.pwd() geo = node.geometry() |
which lets you handle the geometry to begin with. Other important hou.( . . . ) calls can be seen in this reference page. To view how to handle the geometry specifically with python you must look in here in the hou.geometry reference page.
Python and Attributes
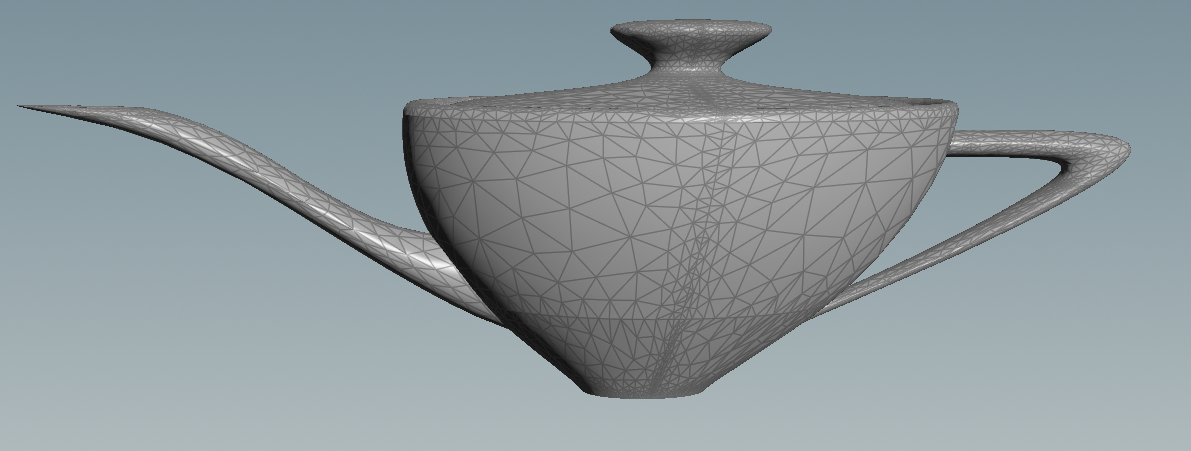
Let us look at some basic commands in action that make python use the attributes of a given geometry. Let us start with a boring teapot.

Now we want to change the shape of this teapot by manipulating the position attributes.
For now we performed the change in shape using just another point wrangle node.

True, this is an ideal task for VEX code, by let us just for learning purposes try to perform the same actions using python code. Let us do this and a few things more using the following set of nodes.
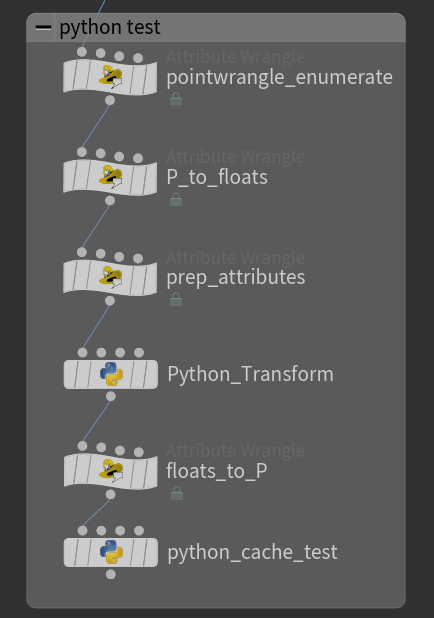
You might be surprised why we have so many attribute wrangle nodes in between. They only have very small tasks to perform here to help to make use of the python node. Let us look at the tasks one by one.
Firstly, since pyhton is not able to access our beloved index point index i@ptnum we have to create an attribute just for that. It is good to have a point wrangle node just parse this:
|
1 2 3 4 5 |
// store the point ID as an attribute for // python to read it. Python can not read @ptnum. i@id = @ptnum; // in this particular example, we don't actually need this. |
Secondly, since python will read the attributes of all points in a single array it is very convenient to split the vector v@P into 3 floats f@px, f@py and f@pz. We do this in the second point wrangle node.
|
1 2 3 4 5 |
// store P to floats because to // simplify the arrays in python f@px = @P.x; f@py = @P.y; f@pz = @P.z; |
Next we have an attribute wrangle node to store two detail attributes. We do this to demonstrate that trying to write into an attribute inside python that does not exist yet will lead to an error (unless you add it with a special command).
|
1 2 3 4 5 |
// create empty global attribute values so // that python can handle them i@numberOfPoints; s@someString; // or add the attributes from within the python nodes (see below) |
Then we finally get to the real work of this tutorial. The python code that makes our teapot great again:
|
1 2 3 4 5 6 7 8 9 10 11 12 13 14 15 16 17 18 19 20 21 22 23 24 25 26 27 28 29 30 31 32 33 34 35 36 37 38 39 40 41 42 43 44 45 46 47 |
# here we import numpy to handle the arrays. You might need # to install SciPy first. We have a tutorial on installing SciPy. import numpy # this is always at the beginning node = hou.pwd() geo = node.geometry() # read the positions as floats px = numpy.array(node.geometry().pointFloatAttribValues("px")) py = numpy.array(node.geometry().pointFloatAttribValues("py")) pz = numpy.array(node.geometry().pointFloatAttribValues("pz")) # make the teapot expensive # these are array operations. All points transformed at once r = 1.1; px = px*( py + r ); pz = pz*( py + r ); # store results into attribute for VEX code geo.setPointFloatAttribValuesFromString("px",px.astype(numpy.float32)) geo.setPointFloatAttribValuesFromString("py",py.astype(numpy.float32)) geo.setPointFloatAttribValuesFromString("pz",pz.astype(numpy.float32)) # cache the data in for later python nodes (just to demonstrate) # You can cache anything (matrices, arrays, strings etc.. of any size) # inside nodes to later grab them again. # if you want to cache it so that it can # always be accesed again grab this node: cache_node = hou.node(".."); # if you rather only want to cache it # for the next node use the local node: local_cache_node = hou.pwd(); # you can then store them by any name # global: cache_node.setCachedUserData("px",px) cache_node.setCachedUserData("py",py) cache_node.setCachedUserData("pz",pz) # local: #local_cache_node.setCachedUserData("px", px) #local_cache_node.setCachedUserData("py", py) #local_cache_node.setCachedUserData("pz", pz) |
The comments in the code already explain what each command does. Note that in python nodes you will always encounter these 3 tasks:
- read or create the input
- perform computations on the input
- store the output
Step 1: read or create the input. This is done through special reading python calls such as node.geometry().pointFloatAttribValues(“attribName”) to read from the attributes. This is also the part where you can read previously cached in values as shown in the second python node below using commands such as cache_node.cachedUserData(“attribName”). You can also create your own input withing the python node as showed in the previous tutorial about creating geometry from scratch.
If your python node has multiple inputs you can access cached values and attributes from each input using the above mentioned command but on distinct nodes. The nodes can be read using node.inputs()[0]. The “[0]” refers to the main input to the node. Remember that python nodes also have multiple inputs. They can be accessed using [0],[1],[2],[3] respectively. An example of this can be found in the supplement materials of this lesson.
Important Note: When using multiple python channels, the zeroth is the most important one. You can only use geo.setPointFloatAttribValuesFromString( … ) If you write on to an attribute that was transmitted through the main input. E.g. point attributes that joined into the python node through the second input are not writable. Remembering this can save you from a lot of suffering. It is generally so, that only the first input is copied over to the node while the other inputs serve more like extra information in wrangler and python nodes that can be read optionally.
Step 2: perform computations on the input. This is python as you know it best. Here you do normal python things. Numpy is a great library that will help you manipulate all values in an array at once. Her you can do matrix multiplications, solve linear systems and many more things that you love.
Step 3: store the output. This is where you either write your solutions into the attributes or where you cache in values for later python nodes. Note that attributes only hold integer, floats, vectors etc. So any matrix that you spend a lot of effort in building in your python code can only be carried over by caching it into a node. We recommend to cache it in hou.node(“..”) for more flexible access as demonstrated and explained in the code.
Attributes can be written into with commands such as geo.setPointFloatAttribValuesFromString(“attribName”,Value.astype(np.float32) ) . Or they can be cached using commands like cache_node.setCachedUserData(“attribName”,Value).
Now we have px, py, pz correctly computed and store in our attributes. However, to make use of them in our geometry we first have to copy them into our v@P vector. We do this using a point wrangle node.
|
1 2 3 4 |
// return the float values to the P vector @P.x = f@px; @P.y = f@py; @P.z = f@pz; |
Now the job is done. We have the exact same designer teapot as we had done with the VEX code. Lets drop in a nice surface material, a textured floor (later tutorials) and some skylight to sell the teapot to rich costumers.

And at last we make another python node to teach you about accessing cached values and creating and overwriting detail attributes. The newly stored values should appear in the geometry spreadsheet. The code below explains itself through its comments.
|
1 2 3 4 5 6 7 8 9 10 11 12 13 14 15 16 17 18 19 20 21 22 23 24 25 26 27 28 29 30 31 |
node = hou.pwd() geo = node.geometry() # Add code to modify contents of geo. # Use drop down menu to select examples. # read cached python variables # grab global cache location node: cache_node = hou.node(".."); px = cache_node.cachedUserData("px") # or local locations from the input slots of the node #px = node.inputs()[inputID: 0,1,2 or 3].cachedUserData("px") # set global attribute geo.setGlobalAttribValue("someString", "bla bla bla") geo.setGlobalAttribValue("numberOfPoints", len(px)) # check the geometry spreadsheet now to see if numberOfPoints # was computed correctly and thus that the caching worked. # add a new attribute from within python abc = 42 geo.addAttrib(hou.attribType.Global, "MeaningOfLife", abc) n = len(geo.points()) geo.addAttrib(hou.attribType.Global, "numberOfPointsAlternative", n) # don't worry about the varmap[] that shows up in the geo. spreadsheet # there are many, many possibilites with python. Check # http://www.sidefx.com/ja/docs/houdini/hom/hou/_index # to be overwhelmed by all the functions. The website # contains many examples. |
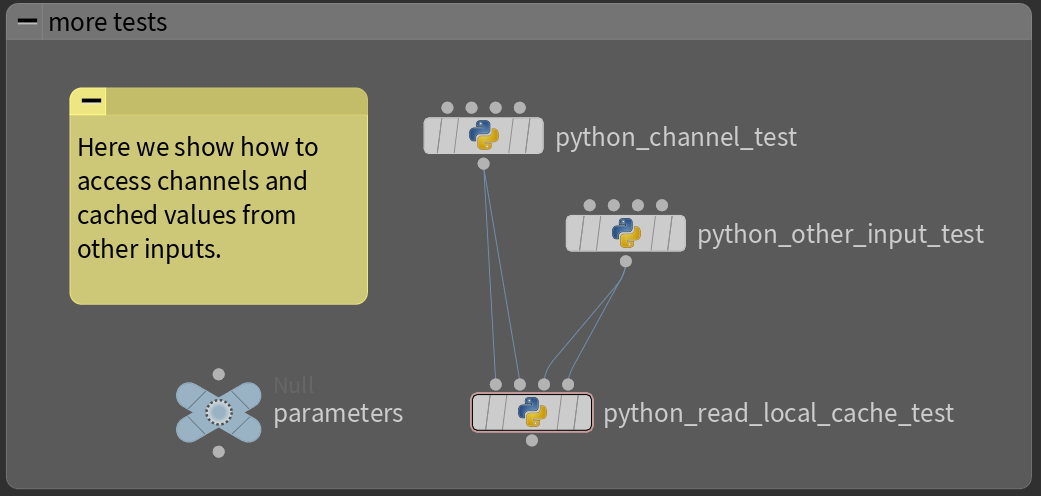
Accessing Channels and Cached Data Examples
To access a parameter from the node or another node you need to use hou.ch(“../nodeName/parameterName”) instead of just ch( … ). Here we test the channel reading ability for a float parameter “epsilon” create in a null node called “parameters”.
We also test how to access cached data from multiple inputs using node.inputs()[id].
Node python_channel_test:
|
1 2 3 4 5 6 7 8 9 10 11 12 13 14 15 16 17 18 |
node = hou.pwd() geo = node.geometry() # python example on how to acces attributes eps = hou.ch("../parameters/epsilon") # save to detail attribute to see if it worked # in the geometry spreadsheet. geo.addAttrib(hou.attribType.Global, "epsilon", eps) # local cache local_cache_node = hou.pwd() # input 0 test local_cache_node.setCachedUserData("0", 0) # input 1 test local_cache_node.setCachedUserData("1", 11) # we will try to read every one of the cached values in the # next node through distinct inputs |
Node python_other_input_test:
|
1 2 3 4 5 6 7 8 9 10 11 12 |
node = hou.pwd() geo = node.geometry() # local cache local_cache_node = hou.pwd() # input 2 test local_cache_node.setCachedUserData("2", 222) # input 3 test local_cache_node.setCachedUserData("3", 3333) # we will try to read every one of the cached values in the # next node through distinct inputs |
Node python_read_local_cache_test:
|
1 2 3 4 5 6 7 8 9 10 11 12 13 14 15 16 17 18 19 20 21 22 23 24 |
node = hou.pwd() geo = node.geometry() # note how we linked the same python node # into multiple inputs in the network view # get the 4 input nodes node0 = node.inputs()[0]; node1 = node.inputs()[1]; node2 = node.inputs()[2]; node3 = node.inputs()[3]; # read the cached values value0 = node0.cachedUserData("0") value1 = node1.cachedUserData("1") value2 = node2.cachedUserData("2") value3 = node3.cachedUserData("3") # inspect the value by placing them in an attribute # to see in the geometry spreadsheet geo.addAttrib(hou.attribType.Global, "value0", value0) geo.addAttrib(hou.attribType.Global, "value1", value1) geo.addAttrib(hou.attribType.Global, "value2", value2) geo.addAttrib(hou.attribType.Global, "value3", value3) |
