Let us get started with Houdini!
I will do my very best to make your entry as smooth as possible. It will be like sitting in a cockpit with the fear of crashing the plane by hitting the wrong button but rest assured that we will bit by bit learn to understand the software. It will be worth it and you will get a nice insight behind the scenes of Hollywood production on the way.
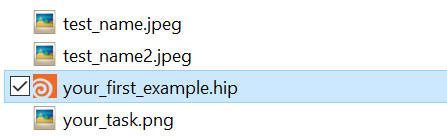
Get to the downloads folders and get the content from “01 Getting Started with Houdini” from the Houdini folder. Then open up the .hip file.
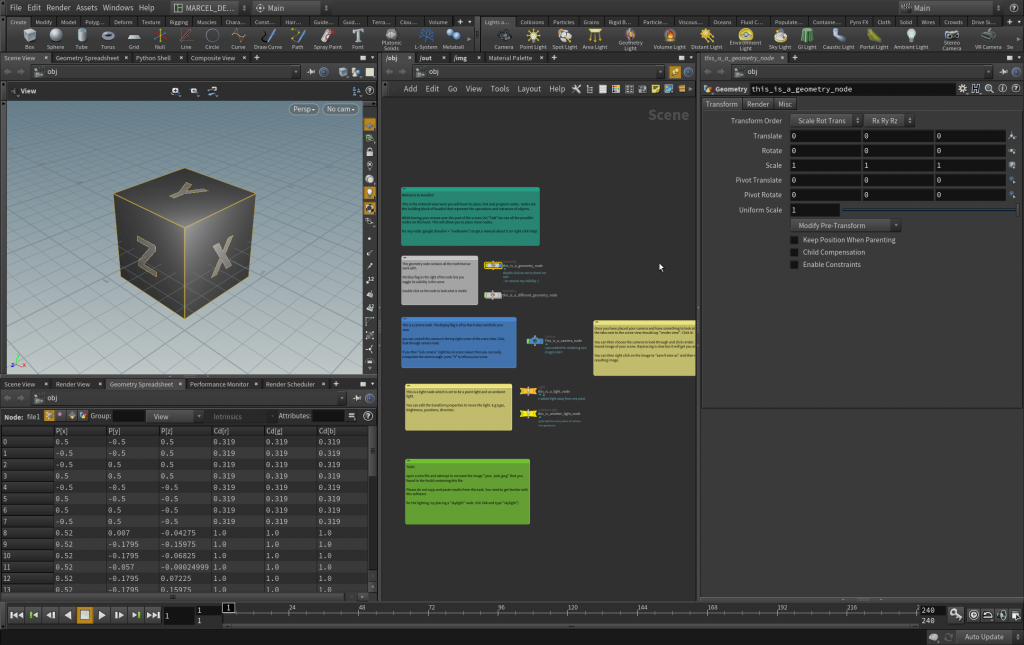
To get this starting screen.
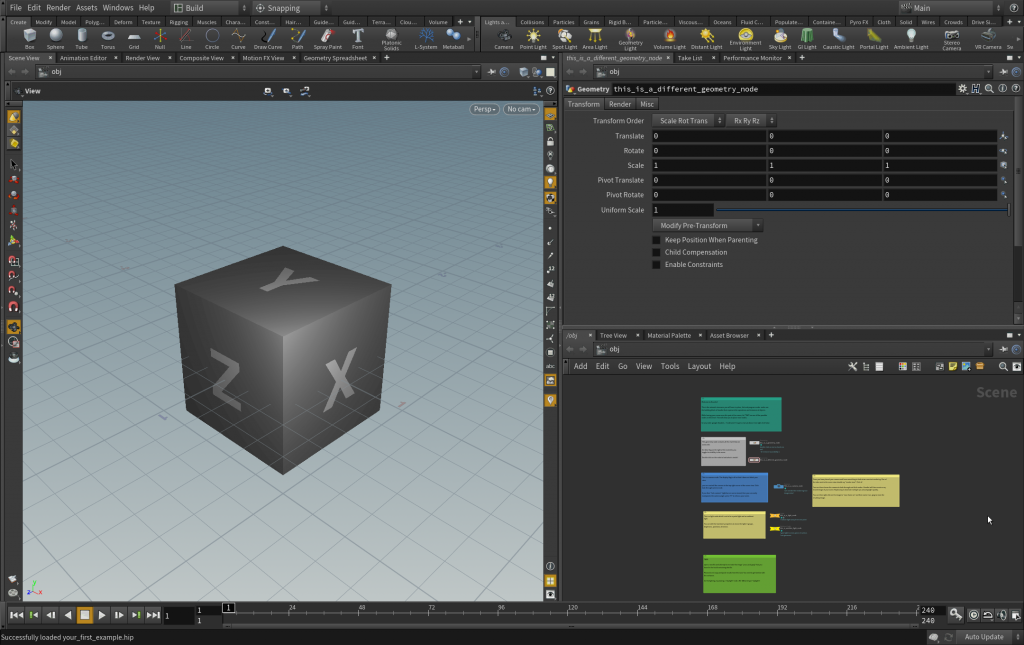
- Bottom right side: Network view
This is where we see the overview of the nodes in the scene. On this layer, you can find geometries, cameras, and lights. Your first exercise in a bit will be to read the comments and double click on the geometry nodes to dive into them. It is good to have a mouse to navigate this panel. - Left side: Scene view
When you click the blue flag on a node in the network view you will see its content in this scene view. - Top right side: Parameter view
When you click on a node, you will see the options of the node here. This will also be the field where you write code into wrangle and python nodes later.
EXERCISE 1:
The comments in the Network view will do their best to explain what is going on. Carefully study what they say and click on the nodes to take a look a the parameters.
- Pro tips (please make use):

- You can place sticky notes as comments in the network view. This can be a great way to communicate with someone who is reading your code. Default shortcut: Shift+p.
- You can put bounding boxes around groups of nodes called network boxes. Select multiple nodes and hit Shift+o.
- You can color in nodes and notes using the color palette. Open the color palette using c.
After looking at all the nodes you should be able to see this: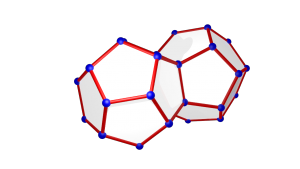
We can also remove the faces (How would you do that quickly?). Then after making multiple translated copies and taking a different camera angle we can get this:


Rendering:
Click on the render view tab and click the render button to see results. You can toggle auto rerender after changes (on by default). For faster previews, you can lower the resolution. Only your final images need a high resolution.

If you are wondering how the rendering works, check out this video:
EXERCISE 2:
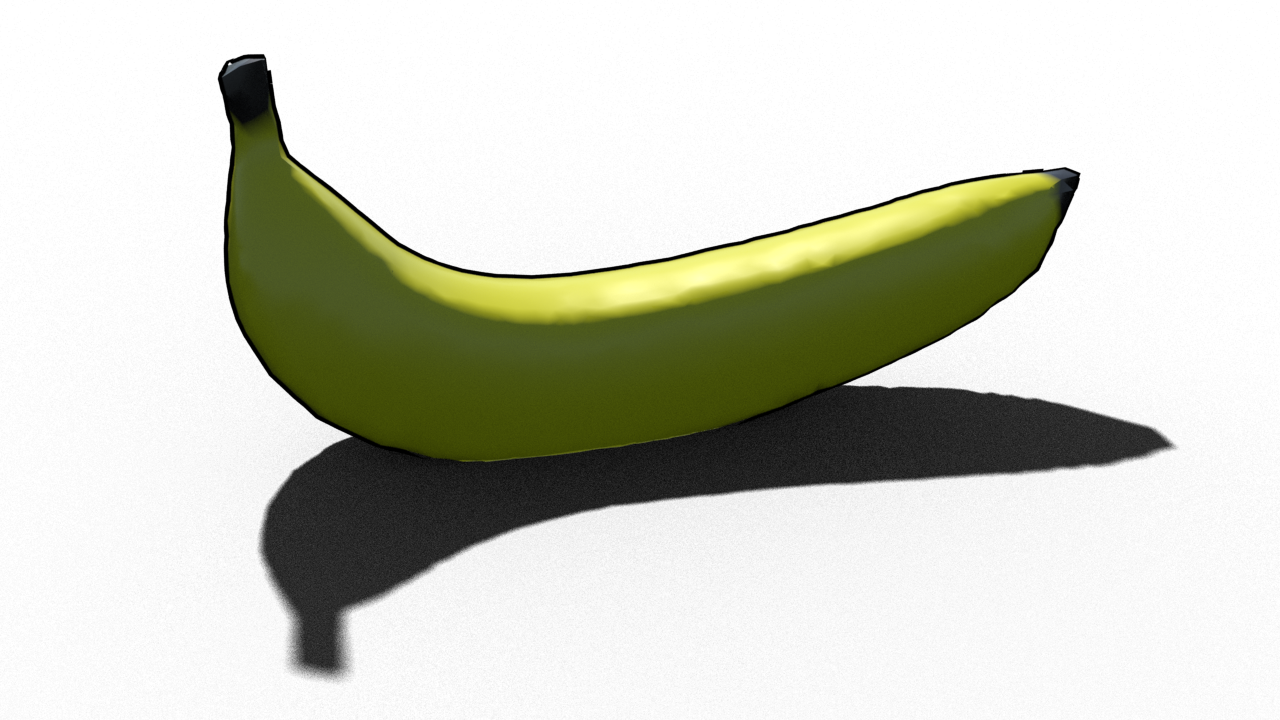
Use your newly gained knowledge to build a scene to render these images.


note: the second image is from the same scene as the first image but has an orthographic camera projection.
EXERCISE 3: (highly recommended for your sanity)
The default window arrangement in Houdini really sucks. Please take 10 minutes of your time to rearrange this to your liking.
Panes:
Each of these small windows is called a pane and each of these panes can be split vertically and horizontally to fit your needs. You can also grab the edges between panes and drag them to resize the window. Figure out a finite set of pane splittings and edge draggings to get a favorable setup (do not care yet about their content). Try to mimic the setup from the image above.

Tabs:
Now that you have the panes set in place we can fill them with life. Click on the + sign to open a new tab and click the x sign to close a tab. There are many, many tabs and we will list all the relevant tabs for your life as a mathematician.

We now write down a possible tab layout with little explanations.

- Top left pane

- Scene View: Active geometry observer. Press “Esc” to use standard mouse controls to look around. Press “H” to focus on the object. On the top right you can change viewing options like “Wire Frame” and “Smooth Shaded”. You can also select cameras and lights and then “lock” (right sidebar) the camera view to the scene view and thus manipulate the camera in the scene view. You can also highlight points, show points and primitives numbers, show normals.
- Render Scheduler: overlook and stop render tasks.
- Bottom left pane

- Render View: Render single images and save them. Select a camera and click render. Toggle off autorender if things get slow. Cancel a render with the red “x” sign. Use the snapshot button to compare with previous renders. Right-click on the image to save it as “name.png”.
- Geometry Spreadsheet: Look at attributes. Points, Vertices, Primitives, Detail. You can click on the attribute name to sort them by value. This is super useful for checking values, debugging, and “printing” values into attributes to quickly check them.
- Python Shell: Console for printing while python debugging. Use the “print” command inside a python node (later tasks).
- Middle pane

- Network View: This is the workspace where we see all of our code. The first layer contains geometry nodes (where the math happens), cameras and light. Press the “tab” key to see all the nodes you can place in a current layer. Double click on a geometry node to dive into it and press “u” for “up” to go up one layer again. On each node, click on the right of the node (blue flag) to make it visible in the scene view. Connect the nodes using mouse clicks in order to direct the output of one node to the input of another node.
- Material Pallet: An overview of all the materials in the scene. Draggin a material from the left to the right imports it. You can then edit all the properties of the materials and even add texture. The materials can then be used using a material node that you apply to your geometry.
- Right pane

- Parameters: Any node you click on in the network view or in the material pane will display its options here. This is also the place where coding will happen using so-called wrangle and python nodes.
Saving the Layout:
Finally, once you are happy with your layout, do not forget to save it! Click on the bar on top and “Save Current Desktop As…”. You can save multiple layouts like this and switch between them.

EXERCISE 4: (Take your time to explore!)
Place a skylight node and then play around with geometry nodes. Have a look at all the possible nodes you could get.
